BACK TO SCHOOL

After a long holiday we are slowly getting back into the new term! The past 2 days have all been about getting to know each other, keeping cool and having fun… The children have spent time getting accustomed to their new school environment, teachers and new friends…

Most of the time has been spent in the cool garden enjoying water play and getting to know each other…

The children have had a great time chatting around the creek bed, filling it with water and watching it flow down the river…

Lots of loose parts to explore!

term1 01.jpg

Treasure boxes and baskets to discover…

Free art and clay activities…

And our picture and family wall ready to fill…

I’m feeling very excited for a great year filled with plenty of play!

BACK TO SCHOOL

LOOSE PARTS

I consider having plenty of loose parts available at all times for play one of the most important things at school. There are so many different types, sizes, uses – the list is endless! I’m constantly on the look out for new loose parts to add to our collection at school. I love natural loose parts but I definitely feel there is a place for synthetic loose parts as well.

I like to swop in and out with different items so that there is plenty to inspire play, teamwork and interaction. One of my best buys was a set of large pvc covered colourful shapes. These are always outside and available for construction and building – whether the children are building castles, shops, firetrucks, you name it, there is a constant hive of activity as they move, build and climb. They are fantastic for developing body awareness and movement. In the past I have also provided plastic crates for holding bottles (a LOT of them!) – these are fantastic as they clip into each other and the children can actually construct whole play scenes for themselves.

In the summer months the loose parts are stored in large garden pots in a wooden frame (actually an old sandpit frame) that is often turned into some creative vessel or other. Other great items we love are: various ropes of different length and texture; pinecones; curtain rings; pegs; gutter piping and all the varying joining bits; plastic balls; pebbles in the dry creek bed – the list can be endless!

LOOSE PARTS

DRY CREEK BED

I’ve always wanted a dry creek bed as a play space – but actually making one seemed like an impossible task! Luckily patient husband sat through my drawings and endless pictures and helped come up with a very basic creek bed design to fit our small space. It is one of the children’s favourite spaces to come and you will always find someone sorting, counting, mixing, exploring textures, chatting, balancing or even just having a quiet reflective moment.

The end product was pretty spot on to the vision and drawings I made and even though it’s a “small” creek bed it has actually made the space intimately socially interactive and led the children to be mindful and patient of each other moving around it. As it was arranged against a wall I decided on a half circle design with an “island” in the middle. The island has a little bridge with a small TP on it.

Things we used: Large rocks for creek bed border; thick plastic to line creek bed; malleable plastic mesh for inside cement; cement mix; assorted stones and pebbles to place in cement to set and to fill creek bed.

We were lucky that we had a parking space to clear and sourced a number of larger rocks that formed the basic shape of the creek. We also dug the shape on a slight incline so that if I wanted to put fresh water into the pond side of the creek to splash around in I could. Once the basic shape was dug out we could figure out where the rocks could be placed.

The next bit was a little trickier – I’d advise you get someone with a basic knowledge of cement and its processes to help you out – luckily patient husband was hands on and had a grasp of exactly what I had in mind! To start with he laid plastic in the furrowed out creek bed (best to use a thickish plastic) and then he laid a malleable plastic mesh on the plastic. He then mixed up the cement and spaded and patted it into the creek shape. Once we had the basic shape we arranged a variety of stones and pebbles (the rounded type) into the cement. Although this was time consuming it definitely gives the creek bed a more authentic feel and adds a great textural quality as opposed to plain cement.

And thats IT!! After roughly one week the cement was set and we could place the loose stones and pebbles in the creek bed. Guaranteed the pebbles end up all over the school and it is a maintenance play space, but despite this it is one of the children’s favourite play spaces and totally worth the effort. Unfortunately we don’t get any natural “creatures” inhabiting our creek bed so I will regularly hide plastic frogs, insects, fish, mice etc in the nooks and crannies around the creek. Coupled with some buckets and small fish nets they will spend ages together exploring, catching and chatting about their adventures.

DRY CREEK BED

Getting Started

I’ve always been spoilt for space in my previous school environments – plenty of indoor space and sprawling outdoor areas – endless opportunity to create open ended play areas, set up obstacle courses or make a house…A couple of years ago it became necessary for me to give up my rented school space and relocate to my own front garden – the problem was it was tiny and not at all what I was used to. It seemed impossible at first that I was going to be able to achieve everything I’m passionate about in my small school space – let alone how I was going to convince my school parents that this was going to be  just as good better than our “old” school.

Once the decision had been made to move I just knew I’d have to be super organised in my planning and implementation. With limited space every piece of ground had to have a carefully thought out purpose and plan for it. I’m very fortunate to have the most patient and supportive husband who listened to my ideas and plans and helped me every step of the way. Together with my dad’s help, what could and couldn’t be done slowly started to take shape and my little school adventure started to grow!

The available school space is comprised of a classroom and bathroom (our old en-suite that we gave up for the tiniest room in the house!), an undercover paved carport area leading from the classroom, a front area and a side area. (I’ve added a pic to get a better idea of the space). Basically the school outdoor spaces wrap around the indoor space and extend around 2 sides of the house. The “narrowness” of it all was a great challenge. I had so many ideas to begin with – it was heartbreaking realising I just wasn’t going to fit everything in!

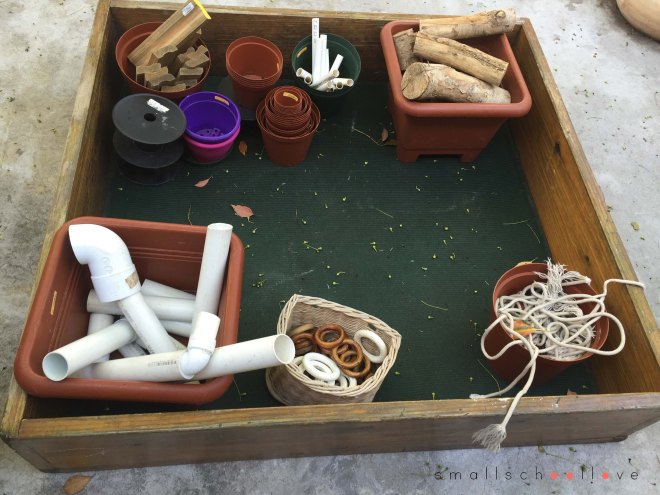
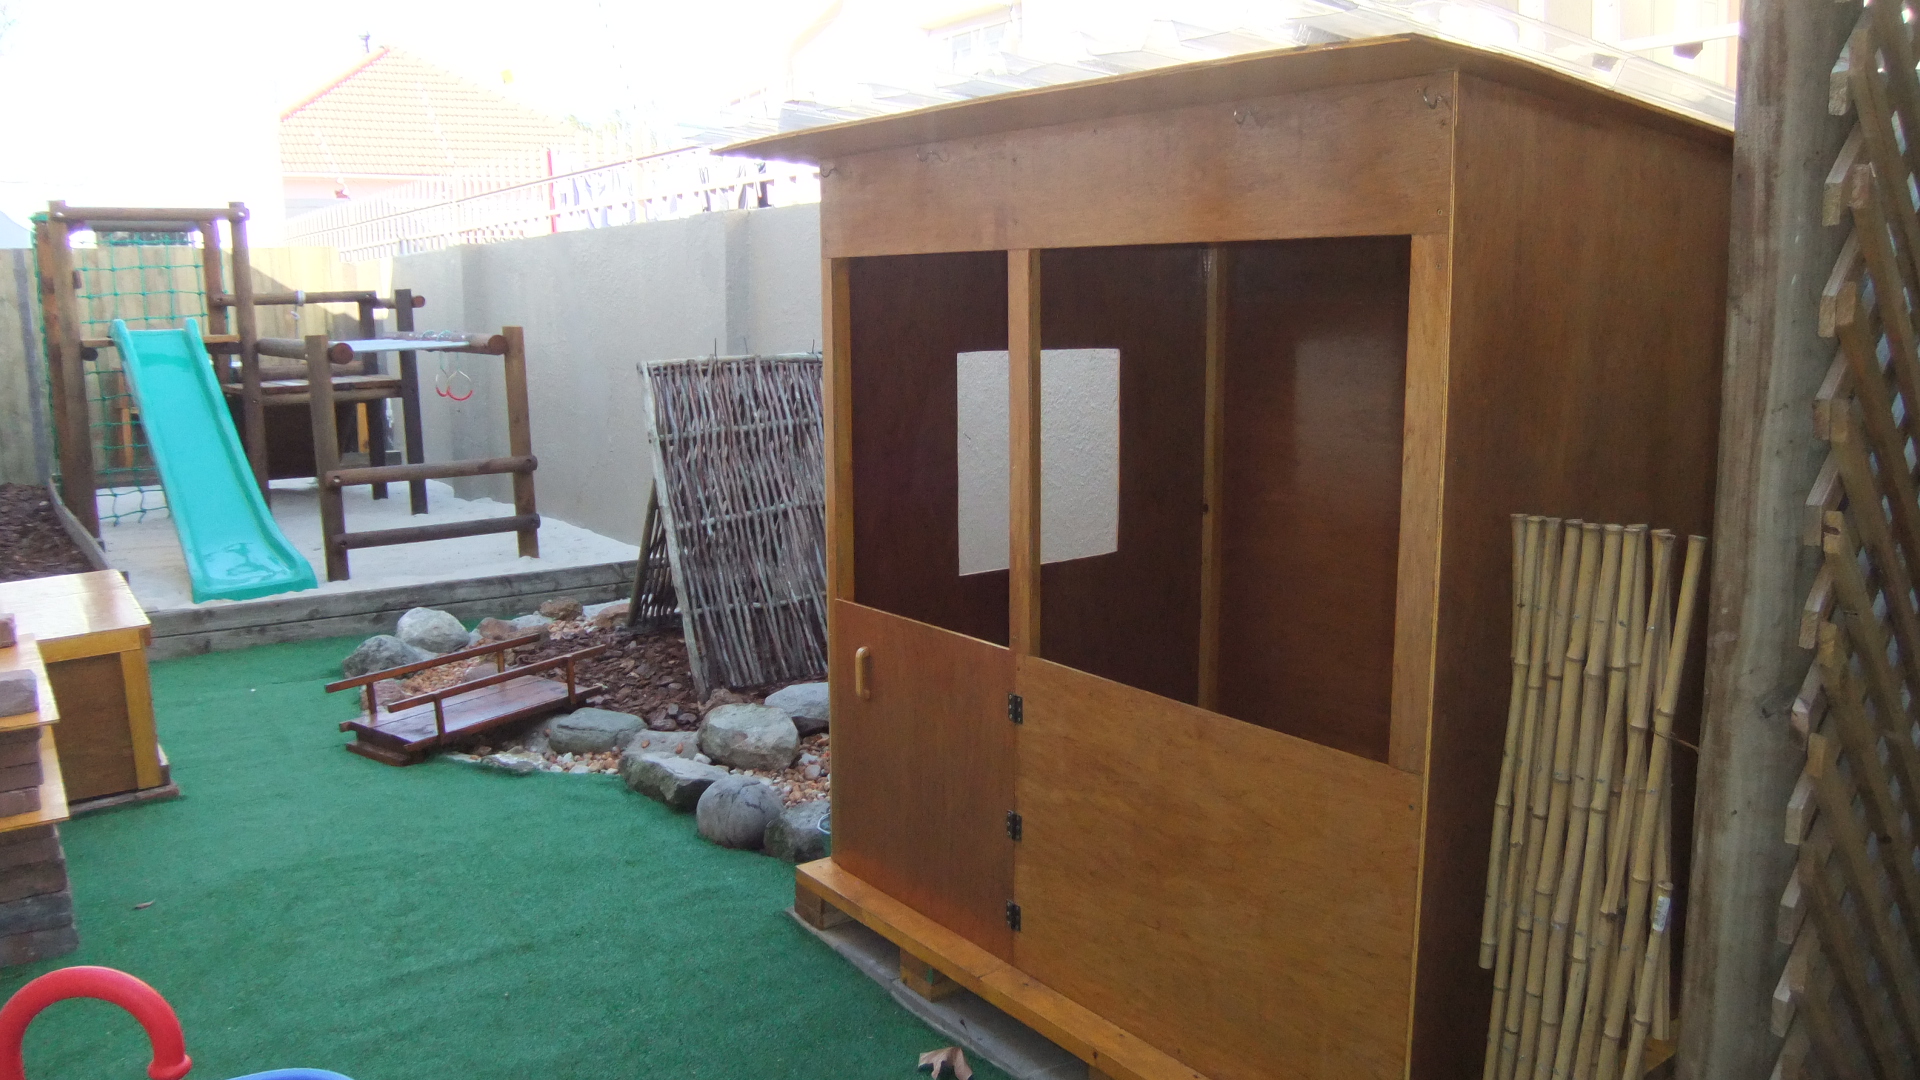
In the end there were a few spaces I was not going to compromise on and from there it was a matter of measuring the space meticulously and trying to fit them in. Taking into consideration that we needed to be able to see all spaces at all times (impossible for one or two areas), width and height played a big role in where these were placed. My wishlist included a jungle gym, sandpit, dry creek bed, playhouse, outdoor kitchen and loose parts area. Many many drafts, measurements and scribbles later we settled on a basic layout.

I sourced a very compromising jungle gym company who were willing to customise the gym for my space. As I mentioned the space is narrow so it had to be narrow! We managed to configure different climbing levels, a ramp, climbing net, slide and monkey bars all over the sandpit area – which keeps it soft underneath for landing and in return provides shade for hot days when the kids are playing in the sandpit. We made the monkey bars lowish – he was very worried that the children would grow and I had to assure him there would be new monkeys every year so no need to worry! This is one of the best things I could have done – the children are confident to attempt the monkeybars and experiment on their own without adult interference – and if they take a tumble they are guaranteed a short soft landing.

You can see from my pictures that we started with a blank canvas – basically a giant sandpit!! To define the different areas we laid different floor surfaces. These were: sand (for sandpit), bark chips for pathways and island, pebbles for dry creek bed and astro turf for main open space.

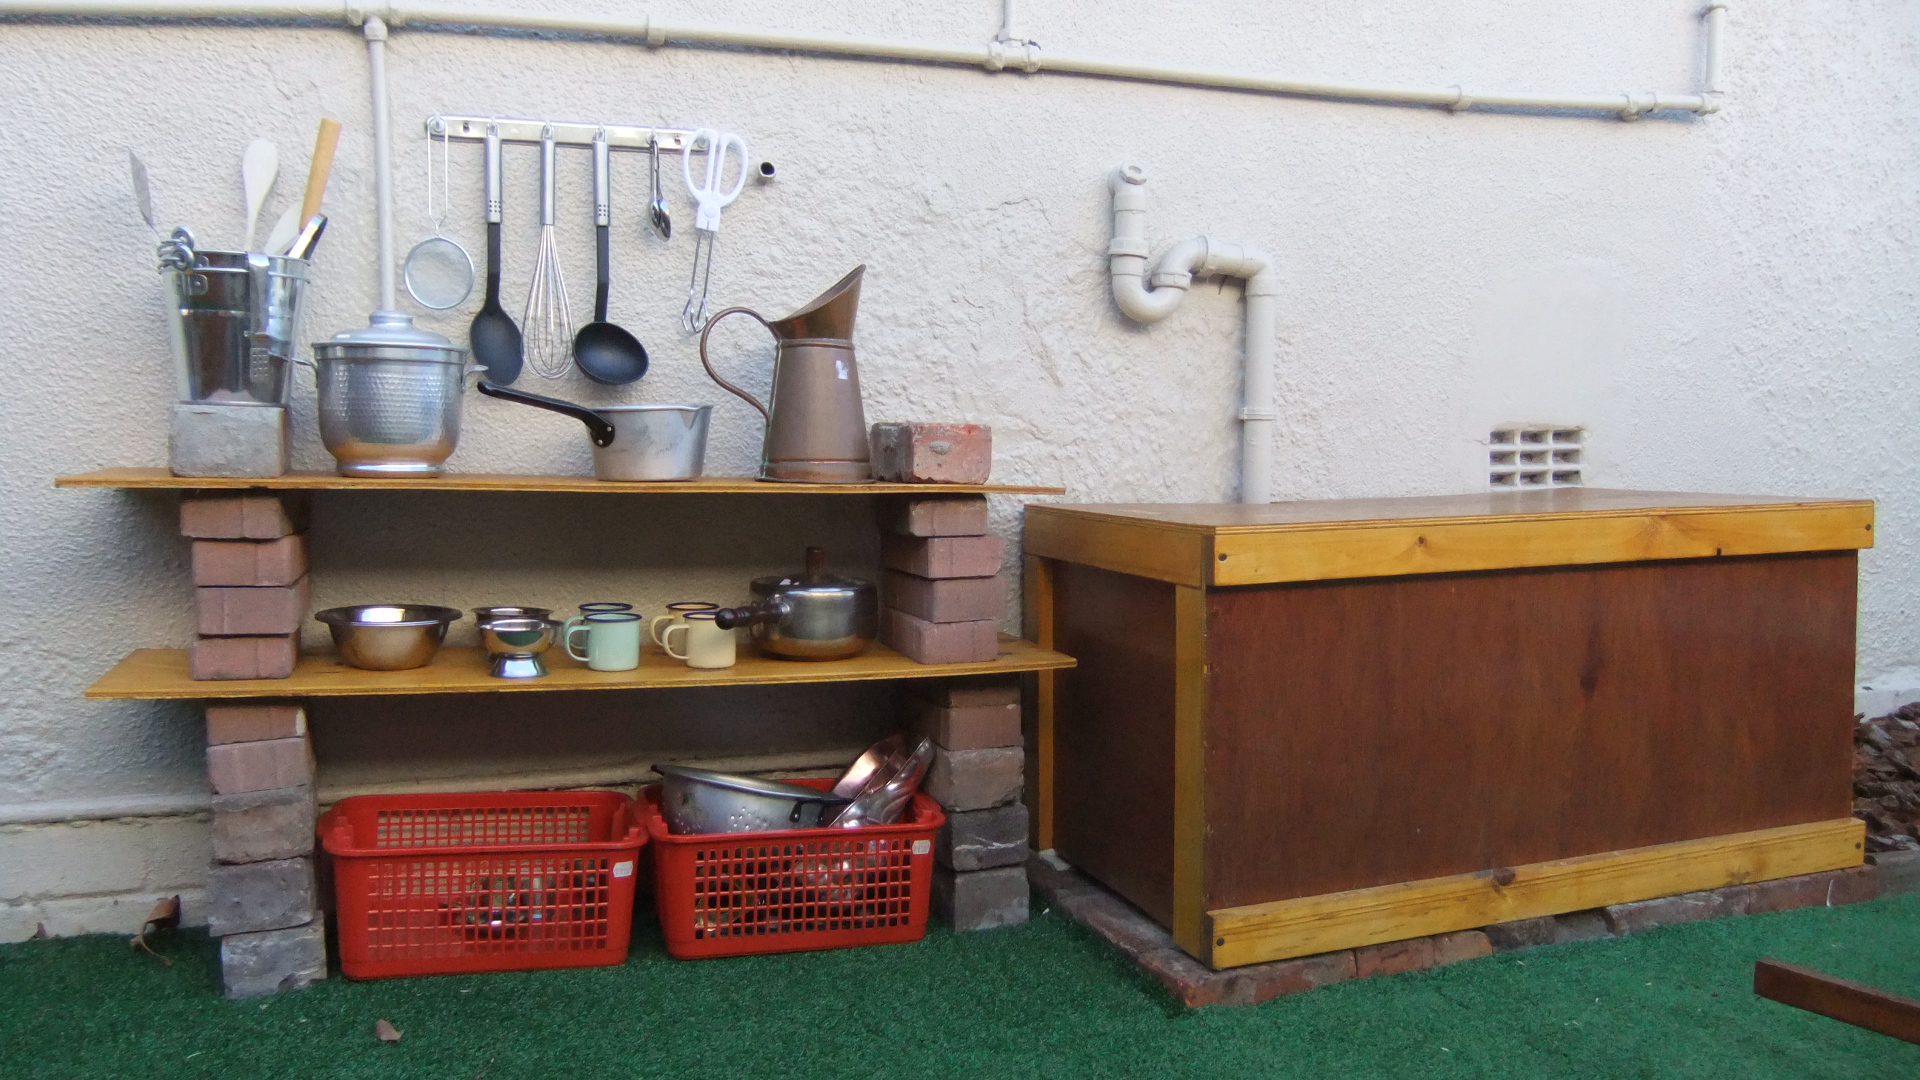
We had an unsightly drain exit from the bathroom right in the middle of the exploratory play area which we made a big sturdy removable box to cover. This has worked excellently and doubles as a work surface in the outdoor kitchen. In fact in a number of places my dad managed to make practical box type coverings that have completely hidden areas I initially had night mares about. Like this box below – it’s now a great surface for preparing messy outdoor activities etc.

Looking back this has been one of the most rewarding practical projects I’ve ever undertaken – it certainly had its challenges and I’m still making changes to date – but overall we managed to achieve safe, practical and workable play areas that the children are able to enjoy in a really small space. I’m able to adapt them to a degree and constantly add or change the environment to suit our school mood. The children spend ages searching for frogs, fishing, climbing, splashing, cooking and socialising in their mini playspace.

DSCF5718DSCF5721

DSCF5724DSCF5725

Getting Started